Saturday, March 31, 2018

Getting closer

Nothing new to post since I'm just trying to finish up the taping on the walls. Once that is complete, I'll be laying down the flooring, priming and painting the walls and then off to the final trim details. It's taking a bit longer since the joint compound is taking longer to dry than expected because of the basement humidity. (even though it's much lower to avoid mold growth, it's still too humid to dry quick enough for me to work.) Images below are in the middle of drying (which you can see in the darker spots) It's almost completely dry now.


Wednesday, March 28, 2018

Another day and so much work to do

Almost done replacing the walls with mold resistant sheetrock. The new flooring is in the basement getting acclimated to the temperature (few days) and by Saturday, I'll be putting it down. I will not be able to do the finish work this week but hoping to get that done after Easter. 


Monday, March 26, 2018

And so it begins

So much to do but I did get a good amount of stuff done.

First, the laminate had to come up. So much laminate..


Getting closer


Now the foam underlayment has to come up and I need to get some air in the walls. There was also some wood composite with a water barrier under that. It was about an inch thick and 2' X 2'  That stuff was heavy....


Enough for one day.


Wednesday, March 21, 2018

It's been a while!

It's been some time and that's because the projects have been small and quick so I didn't think it was a good time to document them. About two weeks ago we had a power outage that caused our sub pump to turn off. As you can expect, the finished basement flooded with 6+ inches of water. I didn't renovate the basement at all, just a little paint and curtains and called it a day. Well thank you water damage, I have to completely gut the basement for many reasons.

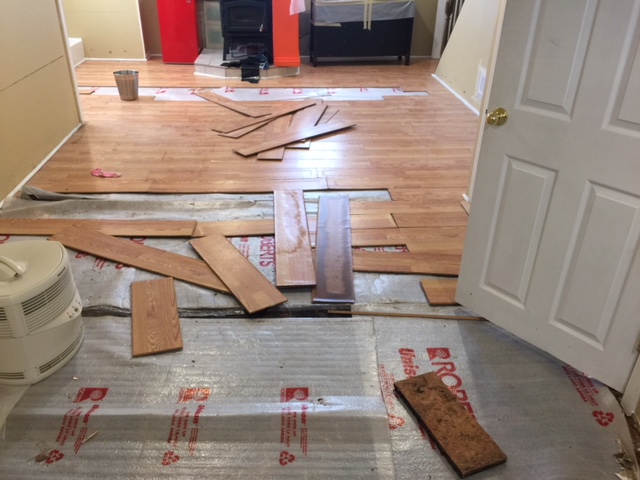
1) Water damaged the laminate wood flooring. Easy enough to fix right? Wrong. Under that flooring was just a simple foam padding and under that some PLYWOOD. Now if you know anything about cement, you know that it can hold moisture. Moisture against wood is like leaving a sponge under the floor. The plywood has to come up, the mold has to be removed and a vapor barrier will need to be installed.

2) I didn't want to redo the whole walls because it was fine. I was going to remove about 2 feet from the floor and repair it but that would've been too easy. I removed a 2 foot by 4-foot section to discover that the framing wasn't to code. I couldn't leave the walls this way because each stud was about 30" apart. It was also made of wood. again... rotted and susceptible to mold. I will be replacing them with metal studs. The walls were also standard sheetrock and not mold/ moisture resistant. Why!?? It's a basement that is naturally humid.

It's going to be a busy time but at least I'll have new things to post. I took the week off my day job to fix the problem. It's going to take longer since I have a flood restoration company coming to dry out the floor before I can restore things back to its original state but I can get a head start on some of the problems.


Top left image is before we moved in and the others were after. I didn't do much since it suited our needs but I'll post an image of the disaster area.


Sunday, October 8, 2017

light fixture

I made this a while back but found some of the process photos on my phone. I figured I would add them here.


Wednesday, July 12, 2017

Recessed lighting

So the bathroom is finally complete and of course other projects jump into place. I'm finishing up adding recessed lights in the living room. Originally when we bought the house, the living room didn't have a light at all. I installed a new light on it's own circuit and put a 3 way switch to turn on the light from two points. After a few years, my wife felt it was too dark so I decided on installing some recessed lighting in the room. 6 to be exact plus the one in the center. I still have to buy the trim and add a new center light (since a dance party caused it to break..)  but the hard part is done. I went with remodel can lights since they required less destruction to the ceiling and were easy to install. The new construction, recessed lights were installed in the bathroom.


Here are the lights installed minus the trim and center light. (Only 3 shown but 6 were installed)


Here is the trim installed. We went a basic reflector trim and LED lights.


Sunday, June 4, 2017

Towel bar and mirror installed


I still have a few things left like matching the drain and toilet handle with the other faucets, door trim and window tile trim as well as the vent. The pedestal sink really helped open the space up a bit more and it feels a bit roomier now.